রেস্তোঁরা POS সিস্টেমরেস্তোঁরা ওয়েবসাইট নির্মাতারেস্তোঁরা অনলাইন অর্ডারQR কোড সহ রেস্তোরাঁর মেনুখাদ্যের ট্রাকরেস্তোঁরা সমূহব্লগনথিপত্রপ্রাইসিংডাউনলোডগুলিলগইনবিনামূল্যে চেষ্টা করুন
icon-papillon
Waiterio
icon-papillonWaiterio
পণ্য▼
রেস্তোঁরা POS সিস্টেমরেস্তোঁরা ওয়েবসাইট নির্মাতারেস্তোঁরা অনলাইন অর্ডারQR কোড সহ রেস্তোরাঁর মেনু
রেস্তোঁরার ধরণ▼
খাদ্যের ট্রাকরেস্তোঁরা সমূহ
ব্লগনথিপত্রপ্রাইসিংডাউনলোডগুলিলগইনবিনামূল্যে চেষ্টা করুন
divider

রেস্তোঁরা POS সিস্টেম

রেস্তোঁরা ও বারগুলির জন্য বিক্রয় ব্যবস্থার সহজ পয়েন্ট

বিনামূল্যে চেষ্টা করুন
Laptop Framescreenshotscreenshot
screenshot

ওয়েটারিও কেন ব্যবহার করবেন

রাজস্ব বৃদ্ধি

দ্রুত পরিষেবা

আরও ভাল সিদ্ধান্ত

grow-revenue

আমাদের বিনামূল্যে ওয়েবসাইট নির্মাতার সাথে আপনি আপনার রেস্টুরেন্টের জন্য একটি দক্ষ ওয়েবসাইট তৈরি করতে পারেন এবং অনলাইনে অর্ডার গ্রহণ শুরু করতে পারেন। এখন আপনি অনলাইনে গ্রাহকদের আকৃষ্ট করে আপনার রেস্তোরাঁ ব্যবসা বৃদ্ধি করতে পারেন। এটি আপনার বিক্রয় উল্লেখযোগ্যভাবে বৃদ্ধি করবে!

quick-service

আমাদের দ্রুত এবং কার্যকরী পয়েন্ট অফ সেল সিস্টেম আপনার রেস্টুরেন্ট পরিচালনা এবং আপনার গ্রাহকদের পরিবেশন করা অনেক সহজ করে তোলে। অর্ডার গ্রহণ, কর্মীদের ব্যবস্থাপনা, চালান তৈরির মতো আমাদের সিস্টেম রেস্তোরাঁ পরিচালনার সাথে পদ্ধতিগত হয়ে ওঠে। এটি আপনার রেস্টুরেন্টের সেবার মান উল্লেখযোগ্যভাবে উন্নত করে!

better-decision-making

আমাদের পয়েন্ট অফ সেল সিস্টেম আপনার রেস্টুরেন্টের জন্য বিক্রয় রিপোর্ট তৈরি করতে পারে। এটি আপনাকে মূল্যবান ব্যবসায়িক অন্তর্দৃষ্টি দেবে কারণ আপনি জানতে পারবেন আপনার ব্যবসার জন্য কী ভাল কাজ করছে। আপনি আরও ভাল ব্যবসায়িক সিদ্ধান্ত নিতে পারেন এবং আপনার মুনাফা বাড়াতে পারেন!

4 টি সহজ পদক্ষেপে রেস্তোঁরাগুলির অর্ডার পরিচালনা করুন

ওয়েটারিও মসৃণ যোগাযোগের সাথে রেস্তোঁরা কর্মীদের একত্রিত করে

1
ক্রম
ওয়েটার ওয়েটারিও অ্যাপ্লিকেশনে (যে কোনও ডিভাইসে উপলব্ধ) গ্রাহকের আদেশে প্রবেশ করে।
2
প্রস্তুতি
শেফ একটি তাপ প্রিন্টার বা একটি রান্নাঘর প্রদর্শন থেকে প্রাপ্ত অর্ডার প্রস্তুত করে।
3
সেবা
শেফ অর্ডারটিকে প্রস্তুত হিসাবে চিহ্নিত করে এবং ওয়েটার এটি গ্রাহকের টেবিলে নিয়ে আসে।
4
পারিশ্রমিক
ক্যাশিয়ার রসিদ মুদ্রণ করে এবং নগদ বা কার্ডের মাধ্যমে অর্থ গ্রহণ করে।

রেস্তোঁরা POS বৈশিষ্ট্য

আপনি যদি একটি শক্তিশালী POS সফ্টওয়্যার ব্যবহার করেন তবে একটি রেস্তোঁরা পরিচালনা করা খুব সহজ হয়ে উঠতে পারে। এখানে ওয়েটারিও পস কীভাবে আপনাকে অনায়াসে আপনার রেস্তোঁরা পরিচালনা করতে সহায়তা করতে পারে তা এখানে।

নির্দেশ ব্যাবস্থাপনা

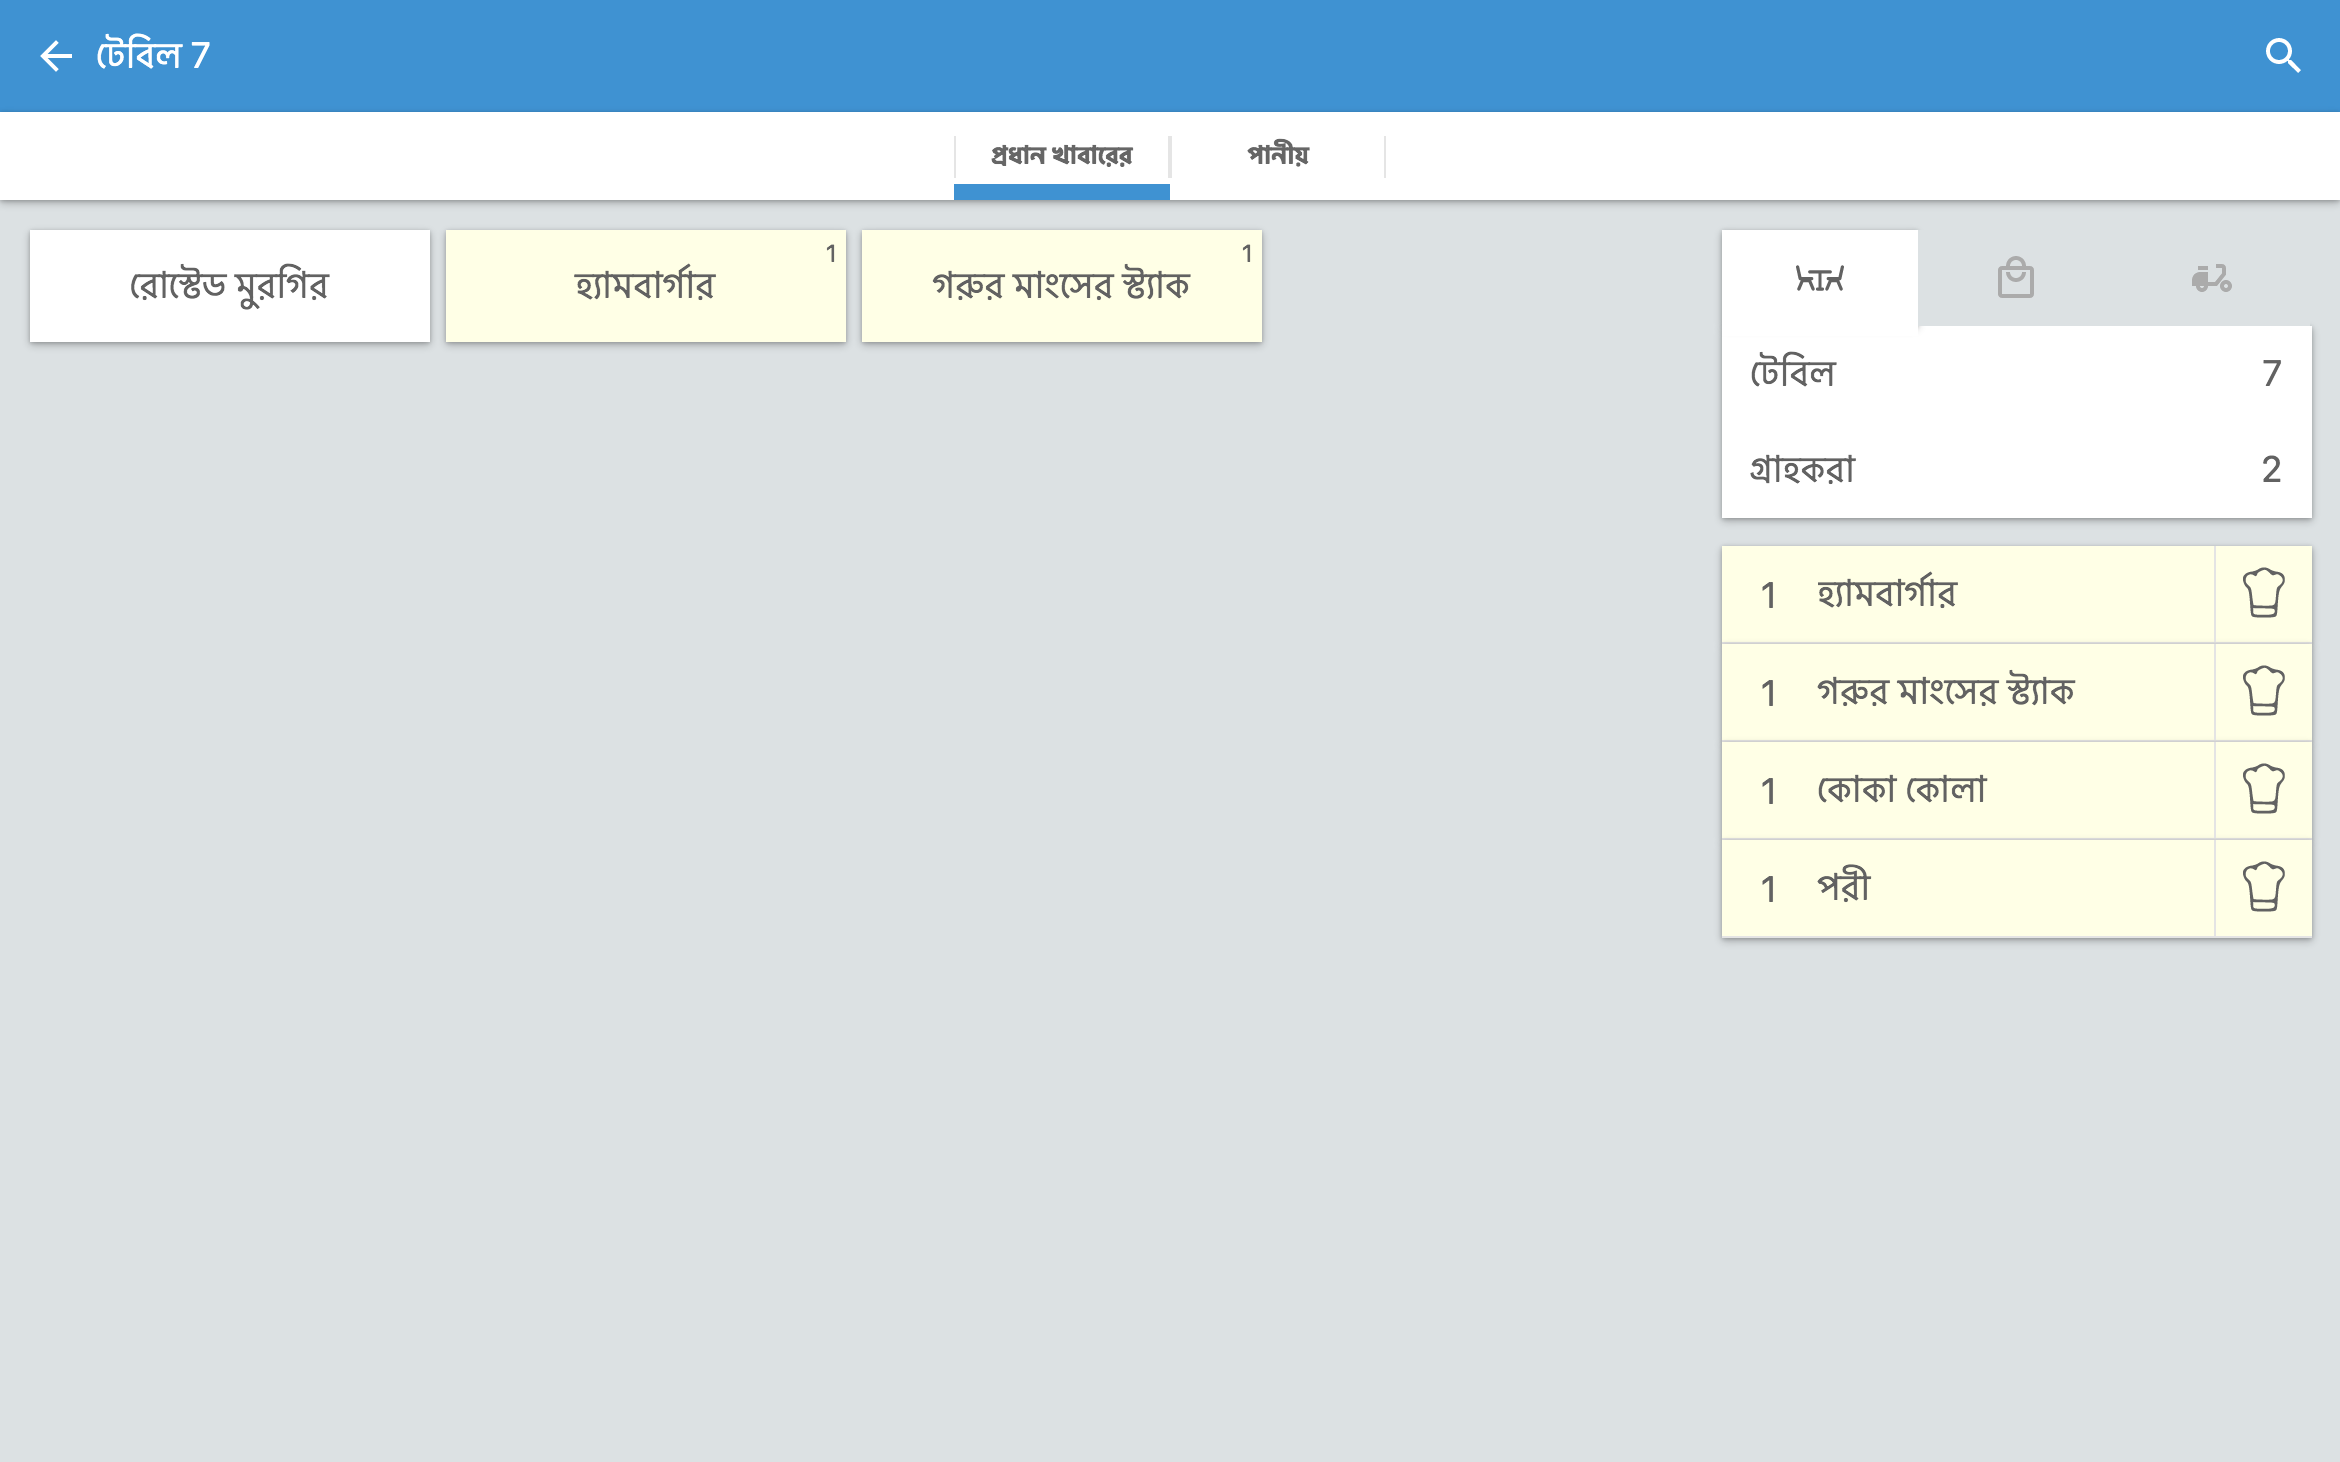
  • রেস্তোঁরাটির যে কোনও জায়গা থেকে যে কোনও ট্যাবলেট বা স্মার্টফোনে অর্ডার নিন।
  • অর্ডারগুলি রিয়েল-টাইমে রান্নাঘরের ডিসপ্লে স্ক্রিনে উপস্থিত হয় এবং প্রিন্টারটি স্বয়ংক্রিয়ভাবে রসিদটি মুদ্রণ করে।
  • আপনার রেস্তোঁরাগুলির অর্ডারগুলি প্রস্তুত, পরিবেশিত বা অর্থ প্রদানের সময় চিহ্নিত করুন।
  • রান্নাঘরে কোনও বিভ্রান্তি এড়াতে সম্পূর্ণ আদেশগুলি প্রদর্শিত হয় না।
  • সেকেন্ডের মধ্যে সহজেই অর্ডার আপডেট করুন বা বাতিল করুন।
taking order on tablet
manage tables in restaurant

টেবিল ব্যবস্থাপনা

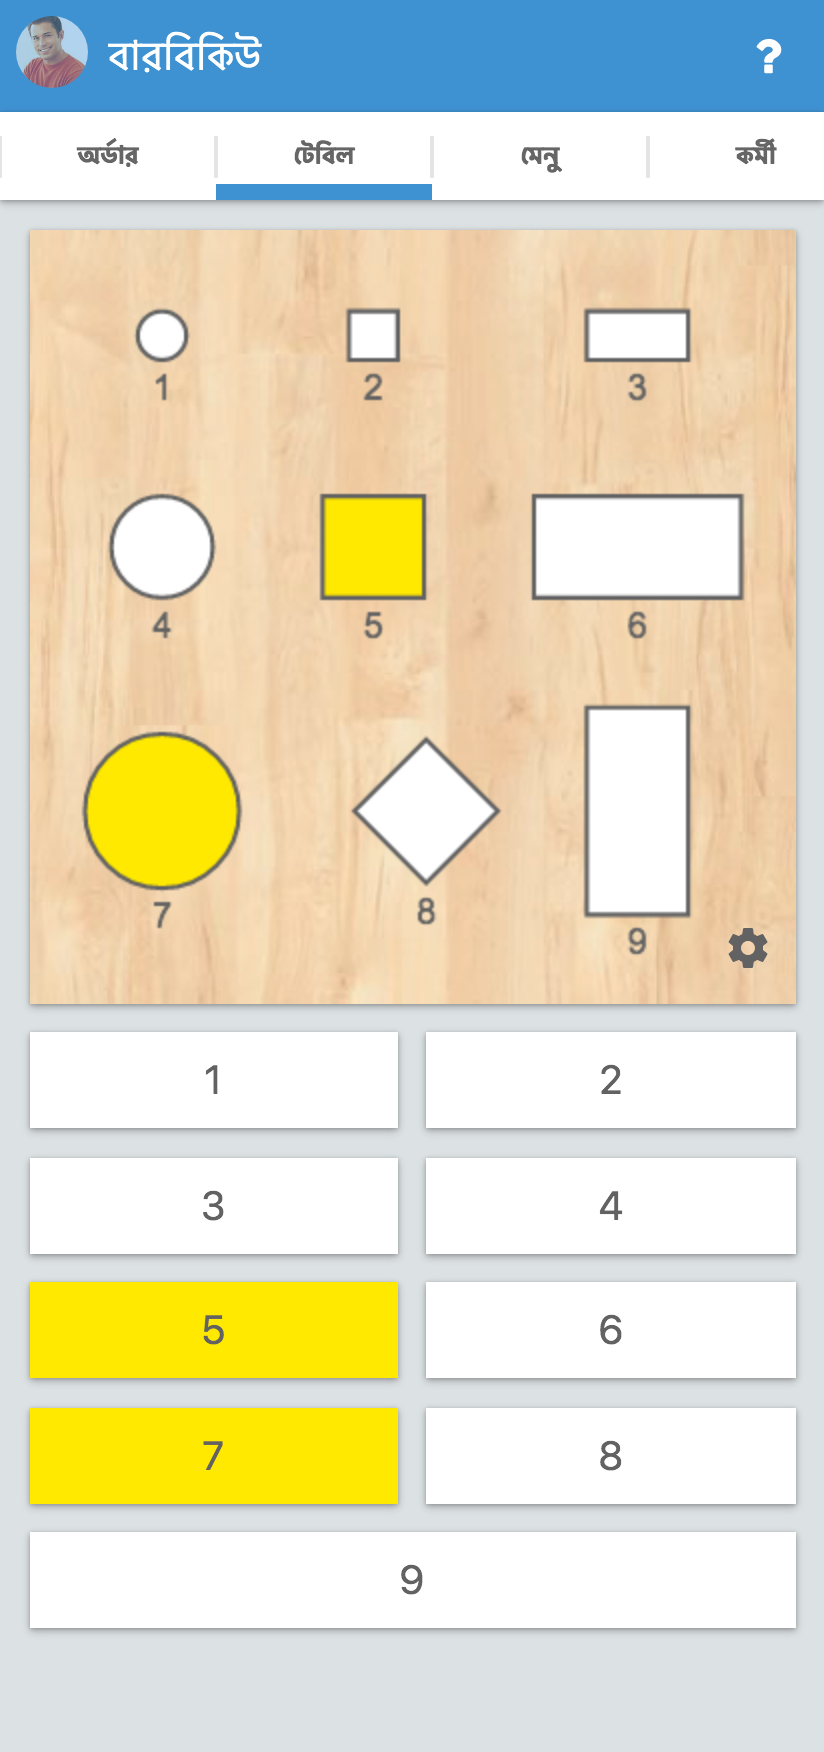
  • বিভিন্ন আকার, আকারের টেবিল যুক্ত করে আপনার রেস্তোঁরাটির একটি মানচিত্র তৈরি করুন এবং তাদের সংখ্যার সাথে নিয়োগ করুন।
  • আপনার রেস্তোরাঁর জন্য একাধিক কক্ষ, বিভিন্ন তল বা বহিরঙ্গন বসার অঞ্চল যুক্ত করুন।
  • মানচিত্রে বা তার নম্বরটিতে টেবিলটি নির্বাচন করে সরাসরি অর্ডার নিন।
  • টেবিল মানচিত্রের মাধ্যমে রেস্তোঁরাটির সমস্ত অর্ডারের সরাসরি আপডেট দেখুন।

মেনু ব্যবস্থাপনা

  • মেনু তৈরি করুন এবং বিভিন্ন ধরণের খাবারের জন্য বিভাগ যুক্ত করুন।
  • আপনার ডিভাইসের কোনও পাঠ্য ফাইল থেকে পুরো রেস্তোঁরা মেনুটি সরাসরি আমদানি করুন।
  • আপনার মেনু আইটেমগুলিতে ফটো যোগ করুন। আপনি আপনার গ্রাহকদের জন্য কাস্টমাইজেশনের বিকল্পগুলিও যুক্ত করতে পারেন।
  • মেনু আইটেমগুলি স্টক বাইরে না থাকলে বা উপলভ্য থাকলে তা লুকান।
  • মেনু বিভাগ এবং আইটেমগুলি সহজেই পুনঃক্রম করুন।
  • আপনার রান্নাঘর, বার এবং নগদ কাউন্টারের জন্য বিভিন্ন প্রিন্টার বরাদ্দ করুন।
manage restaurant menu
manage restaurant staff

স্টাফ ম্যানেজমেন্ট

  • কর্মীদের সদস্যদের তাদের ইমেল ঠিকানার মাধ্যমে সহজেই আমন্ত্রণ জানান।
  • প্রতিটি কর্মী সদস্যকে পৃথক ভূমিকা অর্পণ করুন। সুরক্ষার জন্য প্রতিটি সদস্যের রেস্তোঁরা সফ্টওয়্যারটিতে সীমিত অ্যাক্সেস থাকবে।
  • অর্ডার নেওয়ার সময় ওয়েটারদের স্বয়ংক্রিয়ভাবে টেবিলে বরাদ্দ দেওয়া হয়।
  • মেনুগুলি সমস্ত কর্মীদের জন্য স্বয়ংক্রিয়ভাবে সিঙ্ক হয়।
  • প্রতিটি কর্মী সদস্য রেস্তোঁরাটির চলমান সমস্ত আদেশ দেখতে পারেন।

অর্থ প্রদান এবং ছাড়

  • একই বিলের জন্য বিভিন্ন অর্থ প্রদানের পদ্ধতি নির্বাচন করুন।আরও জানুন
  • গ্রাহকদের ছাড় ছাড়। আপনি একটি স্থির বা শতাংশ ছাড় দিতে পারেন।
  • বিলে স্বয়ংক্রিয়ভাবে ট্যাক্স অন্তর্ভুক্ত বা বাদ দিন।
  • গ্রাহকরা আলাদাভাবে অর্থ প্রদান করতে চাইলে আলাদা বিল তৈরি করুন।
taking credit card payment and giving discount
report analysis

বিক্রয় রিপোর্ট

  • দৈনিক, সাপ্তাহিক, মাসিক বিক্রয় পরিমাণ দেখুন। আপনি কাস্টম তারিখ ব্যাপ্তির মধ্যে বিক্রয় প্রতিবেদন পেতে পারেন।
  • আপনার সর্বাধিক বিক্রিত মেনু আইটেমগুলি সন্ধান করুন।
  • প্রতিটি ওয়েটার আপনার রেস্তোঁরাটির জন্য কত আয় করেছে তা সন্ধান করুন।
  • কোনও খাদ্য অর্ডারের জন্য প্রদানের পদ্ধতি, তারিখ ইত্যাদির মতো বিস্তারিত তথ্য সন্ধান করুন।
  • আপনার ডিভাইসে প্রতিবেদনগুলি ডাউনলোড করুন এবং দেখুন।

দ্রুত সমর্থন

  • আপনার যদি কোনও সমস্যা হয় তবে নির্দ্বিধায় আমাদের বন্ধুত্বপূর্ণ সহায়তা দলের সাথে যোগাযোগ করুন।
  • আমাদের বিস্তৃত টিউটোরিয়াল এবং ডকুমেন্টেশনগুলি পড়ে কয়েক মিনিটের মধ্যে স্ব-নির্ণয় করুন।
  • ওয়েটারিও অ্যাপের মাধ্যমে আপনার ডিভাইস থেকে আমাদের স্ক্রিনশটগুলি প্রেরণ করুন।আরও জানুন
  • আপনার সমস্ত ডেটা আমাদের ক্লাউড ডাটাবেসে সংরক্ষিত হয়েছে, সুতরাং ডেটা হ্রাস সম্পর্কে চিন্তা করার দরকার নেই।
giving customer support

হার্ডওয়্যার

ওয়েইটারিও সমস্ত বড় অপারেটিং সিস্টেমে কাজ করে এবং সমস্ত তাপীয় প্রিন্টার সমর্থন করে। আমাদের পস সফটওয়্যারটি ব্যবহারের জন্য আপনাকে কোনও এক্সক্লুসিভ হার্ডওয়্যার কিনতে হবে না।

যে কোনও ডিভাইস

আপনি ট্যাবলেট, স্মার্টফোন, টিভি, ল্যাপটপ এবং ডেস্কটপ কম্পিউটারে ওয়েটারিও ব্যবহার করতে পারেন। ওয়েইটারিও সমস্ত অপারেটিং সিস্টেম যেমন অ্যান্ড্রয়েড, আইওএস, উইন্ডোজ, ম্যাকস এবং লিনাক্সে কাজ করে।

hardware supports iphone
icon-fab-apple
iOS
hardware support imac
icon-fab-apple
Mac OS X
hardware support tablet
icon-new-android
Android
hardware support windows
icon-windows
Windows

যে কোনও প্রিন্টার

ওয়েটারিও সমস্ত তাপীয় প্রিন্টার সমর্থন করে। অনেক সংস্থাগুলি আপনাকে কেবল একটি বা দুটি ব্র্যান্ডকে তাদের ব্যয়বহুল হার্ডওয়্যার কিনতে বাধ্য করে support

waiterio supports wireless thermal printer brotherwaiterio supports epson thermal printerwaiterio supports star micronics thermal printer

সমস্ত প্রদানের পদ্ধতি গ্রহণ করুন

অর্থ গ্রহণের জন্য একাধিক অর্থ প্রদানের পদ্ধতি সরবরাহ করে গ্রাহকদের আরও স্বচ্ছন্দতা দিন।

payment method credit cards

ক্রেডিট কার্ড প্রসেসিং

কোনও কার্ড ব্যবহার করে অর্থ গ্রহণের জন্য যে কোনও ক্রেডিট কার্ড প্রসেসিং মেশিন ব্যবহার করুন।

payment method vouchers

ভাউচার

আপনার অনুগত গ্রাহকদের আপনি যে ভাউচার দিয়েছিলেন তার মাধ্যমে অর্থ গ্রহণ করুন।

cash payment method

নগদ

নগদ মাধ্যমে অর্থ গ্রহণের জন্য সর্বাধিক প্রচলিত এবং সাধারণ উপায় ব্যবহার করুন।

অনলাইন অর্ডার

মানুষ অনলাইনে খাবার অর্ডার করতে ভালোবাসে এবং আমরা এটি পরিবেশন করতে ভালোবাসি। আমাদের ইন্টিগ্রেটেড পিওএস এবং অনলাইন অর্ডারিং সিস্টেমের মাধ্যমে, আপনি নিজের এবং আপনার গ্রাহকদের জন্য এই প্রক্রিয়াটি সহজ করতে পারেন।

আরও জানুনonline ordering overview

ওয়েটারিও পস সিস্টেম ব্যবহার করে রেস্তোঁরাগুলি

ওয়েইটারিওতে আমরা আমাদের রেস্তোঁরাগুলিকে সর্বোত্তম পরিষেবা সরবরাহ করার জন্য প্রচেষ্টা করি যাতে তারা তাদের ব্যবসায় বৃদ্ধি করতে পারে।

আমাদের শীর্ষ রেস্তোঁরাগুলির সাথে দেখা করুন।

Bios restaurant logo
supadupa restaurant logo
Bio's restaurant logo
Kamisushi restaurant logo
Rodzinna restaurant logo
Dnoodles restaurant logo

এখনও চিন্তা করছি?

ওয়েটারিও পস সিস্টেম কীভাবে আপনার রেস্তোঁরাটিকে বাড়িয়ে তুলতে পারে তা আবিষ্কার করুন।

বিনামূল্যে চেষ্টা করুন

ভাষা

EnglishEspañolDeutschPortuguêsItalianoFrançaisРусскийไทยNederlandsελληνικά中文Bahasa IndonesiaPolskiTürkçe

রেস্তোঁরা POS বৈশিষ্ট্য

নির্দেশ ব্যাবস্থাপনাটেবিল ব্যবস্থাপনামেনু ব্যবস্থাপনাস্টাফ ম্যানেজমেন্টঅর্থ প্রদান এবং ছাড়বিক্রয় রিপোর্টদ্রুত সমর্থন

পণ্য

রেস্তোঁরা POS সিস্টেমরেস্তোঁরা ওয়েবসাইট নির্মাতারেস্তোঁরা অনলাইন অর্ডারQR কোড সহ রেস্তোরাঁর মেনু

রেস্তোঁরার ধরণ

খাদ্যের ট্রাকরেস্তোঁরা সমূহ

রিসোর্স

Statusপ্রাইসিংব্লগনথিপত্রহার্ডওয়্যার

আমাদের অনুসরণ করো

TwitterFacebookLinkedin

আরও লিঙ্ক

ছাড়াইয়া লত্তয়াগোপনীয়তা নীতিশর্তাবলী

যোগাযোগ করুন

info@waiterio.comরেফারেল প্রোগ্রাম
কপিরাইট @ Waiterio 2013 - 2026

সচরাচর জিজ্ঞাস্য

How much does it cost?
icon-chevron-down
All restaurants come with a Free plan that allows up to 100 orders (tables served) per month. In order to take more orders you will need to subscribe to a paid plan, billed monthly or yearly. You can find out about the plans available for your currency by navigating to https://app.waiterio.com/plans after having logged in. You can review, subscribe, unsubscribe, upgrade and downgrade from any plan on your own from within the Waiterio app by following these steps:
  1. Open Waiterio app and login
  2. Tap on the Restaurant tab. Only users with roles admin, owner or manager can view it
  3. Tap on Subscription
  4. If you already have a paid plan, tap on Change plan. You will see all available plans for your currency, Billed yearly or Billed monthly
  5. You can subscribe/upgrade/downgrade to a plan by clicking on the green (Subscribe, Upgrade) or red (Downgrade) button shown at the bottom of each plan. To unsubscribe, use Cancel subscription as explained below
The Waiterio app for Windows does not show Subscription: open https://app.waiterio.com/plans in your browser to manage your subscription.

বাকি প্রশ্নটি পড়ুন
How to set up a USB thermal printer?
icon-chevron-down
You can print receipts and orders using a USB thermal printer connected to your computer.
  1. Download the latest version of Waiterio:
    Download for Windows
    Download for macOS
  2. Install, open and login into the Waiterio application
  3. Navigate to the Printing tab and click on the button Add printer
  4. Set the protocol field to ESC POS
  5. Set the connection field to usb
  6. Input a name for your printer
  7. Click on the Save button
  8. Click on the new printer that just appeared in the Printing tab
  9. Be sure your printer is turned on and connected to your computer with the USB cable
  10. Click on the button Print sample
  11. If the print fails, follow the additional steps below:

Extra steps on Windows

On Windows you will also need to install the WinUSB driver by following these steps:

বাকি প্রশ্নটি পড়ুন
How to add a staff member?
icon-chevron-down
Follow these steps to invite a co-worker to join your restaurant:
  1. Open Waiterio app and login
  2. Tap on the Staff tab
  3. Tap the button Invite staff member. Only users with roles admin or owner can see this button
  4. Enter the email that your co-worker will use to login in Waiterio
  5. Choose the role you want him/her to be granted
  6. Tap the Invite button
  7. If your co-worker is not registered in Waiterio yet, he/she should receive an invitation email
  8. The co-worker needs to Sign Up to Waiterio using the same email you used to invite him/her
Multiple Restaurants If the co-workers were already registered into Waiterio they will be now part of two restaurants.

বাকি প্রশ্নটি পড়ুন
Can I use it offline?
icon-chevron-down
The Waiterio app can be used offline in read-only mode.

It is not currently possible to add new content such as creating a new Order in offline mode.

We do think that the possibility to add new orders in offline mode would be nice.

Unfortunately it is technically very difficult to achieve and we prefer to focus our limited resources into adding and updating more essential features.

We suggest you to get a fast DSL connection and a good wifi router to solve the No Internet connection warnings.

When your main connection is down, a 3G/4G mobile data connection with a sim card, on each device or shared through a portable wifi router, can keep you working. Use it only as a backup: it is usually less stable than a DSL or fiber connection.
How to set up a thermal printer with Ethernet cable?
icon-chevron-down
These instructions will help you setup any Ethernet LAN thermal printer. This tutorial does NOT cover usb and bluetooth thermal printers. A wifi thermal printer is added to Waiterio in the same way (section F), once it is connected to your wifi network. Thermal printers with Ethernet cable are not supported from the app.waiterio.com webapp.
Install the app for Android, iOS, Windows or macOS. A) Find out the IP address of your thermal printer
  1. Turn off the printer
  2. Connect the printer to the electricity and connect an Ethernet cable from the printer to your wifi router
  3. Press down the Feed button and keep it pressed, then turn on the printer while still pressing the Feed button. After 5 seconds the printer should print a paper with written its current settings
  4. Read the setting paper and find the IP address. The IP address should look like 192.168.y.x
B) Find out the IP address of your wifi router Your wifi router has two IP address:

বাকি প্রশ্নটি পড়ুন
Which printer should I buy?
icon-chevron-down
Waiterio works with any thermal printer that uses the ESC POS protocol. Thermal printers with wifi connection are recommended.

Connection Interfaces

Each thermal printer has one or more types of connection interfaces:
  • Wifi
  • Ethernet cable
  • USB
  • Bluetooth (NOT RECOMMENDED)
  • Parallel (NOT SUPPORTED)
  • Serial (NOT SUPPORTED)

Avoid Bluetooth thermal printers

Bluetooth thermal printers should be avoided. Bluetooth thermal printers are cheaper but lose connection very easily. Bluetooth thermal printers are supported only on Android, and many times they don't work on Android either.

Buying online

We recommend to purchase thermal printers on Amazon. The same printer model can have different types of connectivity so it's necessary to check on each ad description the connectivity interface of that specific product sold. It's better to search for "Wifi thermal printer" than by thermal printer model.

বাকি প্রশ্নটি পড়ুন
How can I add extra toppings?
icon-chevron-down
A topping for a dish is called an Extra within the Waiterio app. You can add an extra/topping to any item of the menu or to an entire category of the menu. For example, if you want to add the extra/topping Olives to the item of the menu Margherita you will have to follow these steps:
  1. Open Waiterio app and login
  2. Tap on the Menu tab
  3. Tap on the item Margherita. Only users with roles admin, owner or manager can edit the menu
  4. At the bottom of the item's page, tap on Extras (the row with a + sign) to open Add new extra
  5. Enter the name of the extra/topping
  6. Enter the price of the extra/topping. You can enter 0 for free extra/topping.
  7. Tap on the button Save
  8. Now you will be able to use that extra/topping in any new order

You can add an extra/topping to an entire category of the menu.

You will be able to add that extra/topping to any item of that category in any new order.

বাকি প্রশ্নটি পড়ুন
How to add or change the tables?
icon-chevron-down
You can add and change the look of the tables that are shown in the Tables tab. Follow these steps to edit the tables:
  1. Open Waiterio app and login
  2. Navigate to the Tables tab
  3. Click on the gear icon that appears on the bottom right corner of the map of the tables. Only users with the owner, admin or manager role see this icon.
  4. You should be now in the Map screen where you will be able to add tables.
Add a table You can add more tables to the Map of tables. Follow these steps to add a table
  1. Navigate to the Map screen as described in the previous steps of this guide.
  2. Click on the gear icon that appears on the bottom right corner just below the drawings of the tables in the Map screen
  3. Click on Add new table in the popup menu.
  4. The new table will be added on the top right corner
  5. Read the next point to find out how to change the appearance of the new table
Change a table You can change the name, shape and size of tables. Follow these steps to change the appearance of a table

বাকি প্রশ্নটি পড়ুন
How can I split payments?
icon-chevron-down
Waiterio allows you to split payments and accept partial payments with different payment methods You may want to split a payment for many reasons:
  • two or more customers wish to pay only a part of the bill
  • a customer wishes to pay the bill with two different payment methods (cash and credit card)
You can split a payment following these steps
  1. Open the Waiterio app and login
  2. Create a new order with some items
  3. Navigate to the Orders tab
  4. Click on the icon that looks like 3 vertical dots on the top right corner of the order you created and choose Payment from the popup menu
    NOTE: Users with roles admin, owner, manager and cashier should see a button Payment on each order that allows them to navigate faster to the Payment screen
  5. You should be now in the Payment screen
  6. Click on any item of the order to select it
  7. Selected items should be yellow with a ✓ icon on their left
  8. Click on the green button Pay to continue
  9. Choose the payment method from the horizontal bar (ex. Cash) and click on the green button Paid with Cash
  10. You will see the items you selected appear now as Paid in the Payment screen
  11. Repeat the previous steps to select other items and receive partial payments
Paid items will appear next to a tiny credit card icon in the Orders tab

বাকি প্রশ্নটি পড়ুন
How to connect a cash drawer?
icon-chevron-down
Waiterio supports the automatic opening of cash drawers: the cash drawer opens every time the thermal printer it is connected to prints, if the protocol field of that printer is set to ESC POS or Epson. A cash drawer needs to be connected to the cash drawer port of a thermal printer (often labeled DK) with a telephone-style cable, usually with RJ11 or RJ12 plugs. This cable looks like an Ethernet network cable, but its plug is narrower: never plug it into the Ethernet port of the printer. If your thermal printer has two ports for the cash drawer cable then you should use PORT 1.
How can I export the reports?
icon-chevron-down
You can export your reports to a file with extension .csv. You can then open the .csv file with any spreadsheet application like Microsoft Excel and Numbers. Follow these steps to export the reports:
  1. Open Waiterio app and login
  2. Navigate to the Reports tab. Only users with admin, owner or manager roles can view the Reports tab
  3. Select a period of time like Today, Yesterday, This week, This month from the field at the top of the page
  4. Click on the button Export .csv. On a smartphone this button may appear as a download icon drawn as an arrow pointing down.
  5. Save the .csv file on your device.
  6. Open the .csv file with a spreadsheet application like Microsoft Excel or Numbers
On Microsoft Excel follow these extra steps:

বাকি প্রশ্নটি পড়ুন
How can I delete my account?
icon-chevron-down
You can request us to delete your account by contacting us through the live chat in the bottom right corner or by writing us at info at Waiterio dot com. If you have an active subscription you will need to first cancel your subscription through the app.
How to synchronize data across multiple devices?
icon-chevron-down
All the data of your restaurant is synchronized automatically across all the smartphones/tablets/computers that have a stable internet connection and are logged in the same restaurant. Why my orders aren't appearing on some device? An order should appear on every device of your restaurant few seconds after that a waiter has sent it. This is also true for all the changes made to menu and the tables. If your orders aren't synchronizing please read the points below to find out how to fix it. A) Multiple restaurants The first thing to do if your orders or menu aren't synchronizing is to be sure that all the devices of your restaurant are logged in the very same restaurant. Follow these steps to be sure of this:
  1. Open Waiterio app and login
  2. Navigate to the Account tab
  3. Click on the Logout button at the bottom of the page
  4. Log back in the app
  5. If during the login you are asked to choose a restaurant in the Select restaurant window, then your user is part of multiple restaurants. You will have to pay extra attention to login in the very same restaurant on all your smartphones/tablets/computers where you are using Waiterio
  6. Repeat the steps above for ALL the devices of your restaurant.
B) Unstable internet connection Waiterio requires a stable internet connection in order to synchronize data across all devices. Read the checklist below to discover more about how to have a stable internet connection:

বাকি প্রশ্নটি পড়ুন
How can I give discounts?
icon-chevron-down
Waiterio allows you to give discounts to customers Follow these instructions to give a one-time discount:
  1. Open the Waiterio app and login
  2. Create a new order with some items
  3. Navigate to the Orders tab
  4. Click on the button Payment at the bottom of the order you created
    NOTE: Users with roles admin, owner, manager and cashier should see the button Payment on each order. Other users can click on the icon that looks like 3 vertical dots on the top right corner of the order and choose Payment from the popup menu
  5. You should be now in the Payment screen
  6. Click on the icon on the top right corner that looks like a percentage % sign on an arrow pointing down
  7. Enter the quantity of the discount and choose its quantity type: percentage for a percentage discount (ex 10%) or fixed for a fixed discount (ex 5$)
  8. Click on the button Add to apply the discount to the order
It's currently not possible to create permanent discounts to re-use across multiple paying customers.

বাকি প্রশ্নটি পড়ুন
How to set up self-ordering with QR codes?
icon-chevron-down
Waiterio allows you to print QR codes to attach to your tables. Customers will be able to scan the QR codes with their smartphones to view the menu and self-order. You can set it up following the steps below:
  1. Open Waiterio app and login
  2. Navigate to the website tab and click on "Self order with QR code" at the bottom of the page. Only users with the owner, admin or manager role see the website tab.
  3. Click on "Download QR codes", this will download a .pdf file that contains the QR Codes of all the tables in your restaurant
  4. After downloading the .pdf file, you need to print it using an inkjet printer on an A4 size sticky paper. You can buy sticky paper online by clicking on "Buy A4 sticky paper" on the same page, which searches for it on Google
  5. Follow the outlines and cut out the QR code stickers. The printed page contains the room and the table information along with the QR code. The table label at the bottom of each QR Code tells you which table the QR Code represents.
So what happens now?

বাকি প্রশ্নটি পড়ুন
How to accept card payments?
icon-chevron-down
Waiterio allows you to accept card payments both online and in-person.
  1. Navigate to the Restaurant tab and scroll down until the section Online and POS payments. Only users with the owner or admin role see this section, and only when the restaurant is in a country where card payments are available.
  2. Click on the Legal entity button and enter your business information as either a company or an individual, then click on Save.
  3. From the Restaurant tab click on the Bank account button to provide the checking account coordinates where you wish to receive the payouts for the card payments, then click on Save.
In-person payments You can accept card payments in-person from your customers using an external POS terminal or a smartphone with Tap to Pay support. Tap to Pay on iPhone Tap to Pay is supported on the iPhone XS from 2018 and newer models. The iOS version installed on the device should be iOS 16.4 or newer.

বাকি প্রশ্নটি পড়ুন
How to set up a Bluetooth thermal printer?
icon-chevron-down
You can print receipts and orders using a Bluetooth thermal printer connected to your smartphone or tablet. This tutorial does NOT cover usb, wifi or ethernet cable thermal printers. Currently bluetooth print is only supported on Android devices. The Waiterio app for iPhone and iPads does not support bluetooth printing yet. A) Pairing First of all you are going to need to pair your smartphone or tablet to the bluetooth thermal printer.
  1. Turn on your bluetooth thermal printer
  2. Open the Settings app on your smartphone or tablet
  3. Click on Bluetooth
  4. Turn ON the bluetooth
  5. Your smartphone/tablet will scan for nearby bluetooth devices
  6. Click on the name of your bluetooth thermal printer to start the Pairing
  7. Your bluetooth thermal printer should now be listed under Paired devices
B) Find out the MAC address of your thermal printer The Waiterio app is going to need the MAC address of your bluetooth thermal printer. The MAC address of a bluetooth device should be in this format: 01:23:89:AB:CD:EF. On Android you can find the MAC address of your bluetooth device by installing the Bluetooth Address Finder app

বাকি প্রশ্নটি পড়ুন
How to set up a Wifi thermal printer?
icon-chevron-down
You can print receipts and orders using a Wifi thermal printer connected to your Wifi network. This tutorial does NOT cover usb, bluetooth and ethernet cable thermal printers. Wifi thermal printers are not supported from the app.waiterio.com webapp.
Install the app for Android, iOS, Windows or macOS. Adhoc Wifi or setup application on the CD? Some Wifi thermal printers create an adhoc wifi network that you can use to provide them with the SSID and password of your wifi hotspot router. Some other Wifi thermal printers must be configured with an application that was available on the CD that came with the printer. Follow these steps to find out if your Wifi thermal printer can be setup using an adhoc wifi network or using a program from the CD:

বাকি প্রশ্নটি পড়ুন
Can I use Waiterio with ChatGPT, Claude or other AI assistants?
icon-chevron-down
Not yet. Waiterio doesn't have a connector for AI assistants such as ChatGPT, Claude, Muse, Gemini, Copilot or Grok, so they can't read or change your Waiterio data, and there is no setting in those apps that connects them to Waiterio. If you'd like to use Waiterio with an AI assistant, tell us here what you'd want it to do for you. It helps us decide what to build first.